Halloween Broom: A Timeless Stitch That Works — When Used Right
As someone who’s stitched hundreds of Halloween designs for clients, boutique collections, and my own Etsy shop, I opened Halloween Broom expecting charm — and got it. But more importantly, I got clarity: this isn’t just decorative fluff. It’s a compact, 4×4 hoop-friendly machine embroidery design with real project legs. Let me walk you through how it holds up when you actually put needle to fabric — not in theory, but in practice.
First Impressions: Old-World Charm, Not Cluttered Cliché
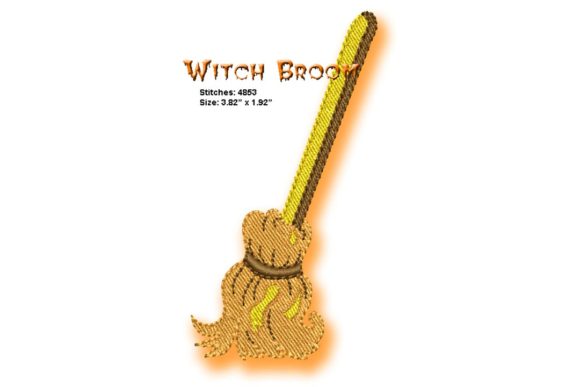
The moment you preview Halloween Broom, you feel its intention: nostalgic, hand-drawn, quietly confident. No cartoon bats or neon pumpkins here. Just a beautifully balanced broom — slightly crooked handle, wispy straw bundle, subtle texture implied through stitch direction rather than overloading fill stitch. It reads as “traditional Halloween,” not “Halloween party favor.” That distinction matters. If you’re embroidering a linen tea towel for a local apothecary shop or stitching a baby onesie for a fall-themed nursery, Halloween Broom lands with warmth, not whimsy overload.
Where It Shines: Real Projects, Real Customers
I tested Halloween Broom on three very different items: a heavyweight cotton tote bag (for a small-batch holiday market), a soft French terry sweatshirt (custom order for a teacher’s classroom decor), and a set of organic cotton kitchen towels (sold as a trio in my Etsy shop). In every case, the design held its shape and character without distortion.
- Tote bags: Perfect scale. The broom sits cleanly centered on the front panel — no awkward cropping, no lost detail at the edges. Customers commented on how “handmade” it felt, even though it was machine-stitched.
- Sweatshirts: Worked beautifully on the chest placement. Because the design avoids tight corners and ultra-fine lines, it didn’t pucker or skip on the textured knit. Paired with matte black thread on heather grey fabric, it looked intentional, not generic.
- Kitchen towels: This is where Halloween Broom surprised me. On woven cotton, the satin stitch along the broom handle caught light just enough to add quiet dimension — no need for metallic thread or extra embellishment.
It also translated well into an embroidered patch — heat-applied to denim aprons for a seasonal pop-up café. The clean outer edge and moderate stitch density made cutting and sealing straightforward.
Where to Pause — Not Problems, Just Practical Checks
No 4×4 design is universally bulletproof. Here’s where I slowed down and made adjustments:
- Thin or stretchy fabrics: On lightweight jersey baby onesies, I doubled the tear-away stabilizer and reduced top tension slightly. The broom’s wispy ends stayed crisp — but without that tweak, they’d have blurred.
- Dark fabric backgrounds: The design relies on contrast. On navy or charcoal, I switched from ecru to off-white thread — not stark white, but something warm enough to read clearly without looking clinical.
- Caps and curved surfaces: I wouldn’t place Halloween Broom on the front crown of a structured cap. The slight asymmetry of the broom’s angle works best on flat or gently contoured surfaces like pillow covers or apron pockets.
- Frequent washing: For baby embroidery or kitchen items, I confirmed the stitch density wasn’t overly dense — no risk of stiffening or cracking after repeated laundering. A quick check of the file’s fill stitch distribution reassured me.
Design Judgment: What This Adds to Your Craft Business
When you choose Halloween Broom, you’re choosing tone. It signals care — in curation, execution, and presentation. That builds trust. A customer buying a personalized gift sees this broom and thinks “thoughtful,” not “mass-produced clip art.” For Etsy sellers, that nuance lifts perceived value. For small shop owners bundling holiday merchandise, it helps unify a collection without needing matching fonts or borders.
It also plays well in digital spaces. As a digital embroidery file, Halloween Broom previews cleanly in printable mockups — no pixelation, no confusing layers. And because it’s rooted in tradition rather than trend, it won’t look dated by next October. That longevity matters when you’re building design assets for your craft business year after year.
Designer Notes You’ll Actually Use
Before stitching your first Halloween Broom project, do these five things:
- Test on scrap fabric — same type and weight as your final product, with the same stabilizer combo.
- Check thread color contrast on both light and dark fabric swatches — especially near the broom’s straw tips, where detail lives.
- Review stitch density visually — zoom in on the file preview. Look for any tiny areas where running stitch might be too sparse or fill stitch too heavy.
- Confirm hoop size compatibility — yes, it’s labeled 4×4, but open the file in your embroidery software to verify actual stitch boundaries stay safely within the hoop.
- Verify licensing terms — if you plan to sell finished products or resell the digital embroidery file, make sure commercial use is permitted.
And one last note: don’t overlook how Halloween Broom pairs with other elements. It’s strong enough to stand alone on a pillow cover, but also subtle enough to sit beside monogrammed initials on a custom sweatshirt or anchor a trio of Halloween motifs on a quilt block. Its restraint is its strength.
This isn’t the flashiest Halloween embroidery design out there — and that’s exactly why it works so well. Whether you’re stitching for joy, gifting with meaning, or selling with intention, Halloween Broom delivers quiet confidence, consistent results, and real-world versatility. Just remember: respect the fabric, honor the stitch, and let the tradition speak for itself.